Its a BLUNDER :(
It did't grow, will try and look for other means growing this plant. The seeds that I sown also didn't shows any sign of life.
First part is : Here
Kuchai The Final Saga : Here
Got myself three bags of Hydroton to try out, should be enough for one growbed.
I never try planting with hydroton, my last experiment with it make me hold on to trying it out. Finally today these three bags will be the Guinea Pig for my Hydroton Growbed. At RM 70.00 per bag its quite a sum to pay, RM 210.00 for these 3 and just enough for one growbed.
Update : 4 bag of 50 Lt is required for Growbed below.
If I use stones or chip pebbles will only set me back about RM 70.00 for 10 bag that enough for same size growbed. Well I need to try, one advantage of Hydroton is its light in weight so, don't need strong racking.
At the same time I bought another two growbed tub, that the 3 feet Guppy Tank. This is for my Hydroton bed and the other one I'll turn into a fish tank to be use with another smaller growbed to test few things.
Will see how it turn out.
My next gowbed I will use Hydroton, so I need another rack. Decide to try out making my own with Slotted Angle Iron since Hydroton is much lighter than pebbles.
I'm making a 36" (W) x 24" (D) x 27" (H) rack what I need is 4 pieces of this Slotted Angle Iron that is 10 ft (120") in length.
It cost me RM 16.00 each at the local hardware and to minimize cost I need to carefully planned the cutting. Each of this will be cut like this 36" x 2 and 24" x 2 which makes it 120" and 2 pieces will be cut the same way the 3rd piece I only need to cut another 2 of 36" , the last piece I cut 27" x 4 for the leg but I should have cut it 30" x 4 making 120" so no waste.
So below I have:
- 36" - 6 off (In photo its 39")
- 24" - 4 off
- 27" - 4 off
Additional hardware required :
- Box of screws and nut (40 Screws and Nut required for this rack)
- Corner Angled - 8 off
- A pair of spanner in this case its 13mm
- Cutting tool - I use that Borsch Angle Grinder with cutting wheels.
- Safety Goggles.
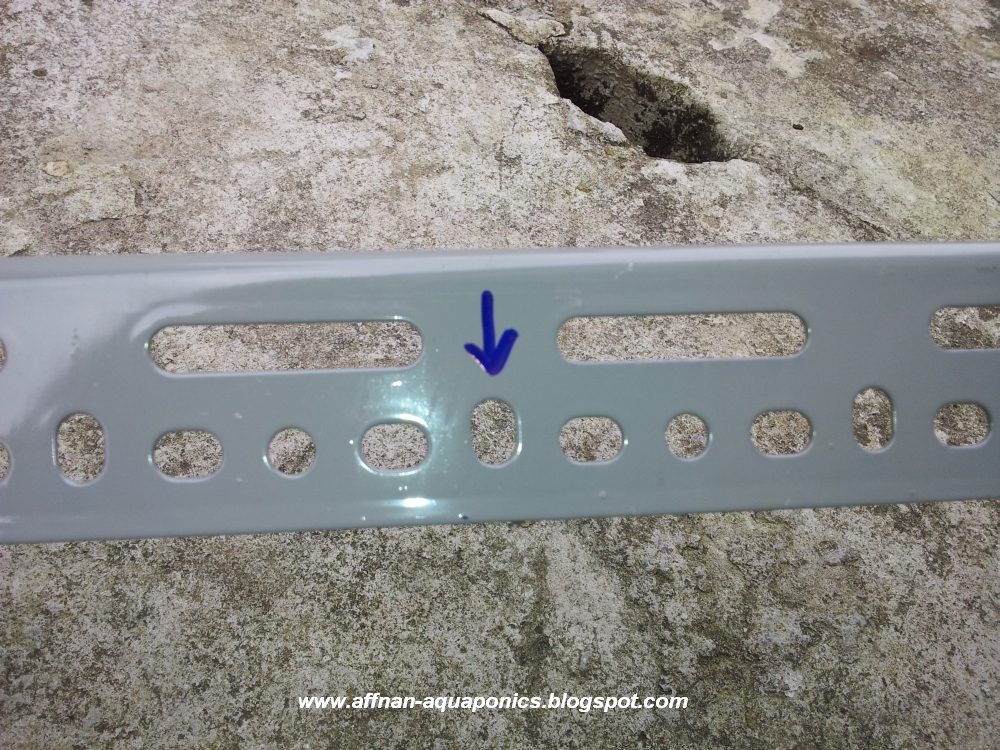
Cut this Angle Iron at multiple of 3" otherwise nut and screw holes won't align properly. Photo below is where you must cut this type of angle iron to avoid problems.
That part above is at every 3" , so if you are making anything using this angle iron, make sure its a multiple of 3" and cut it at this point.
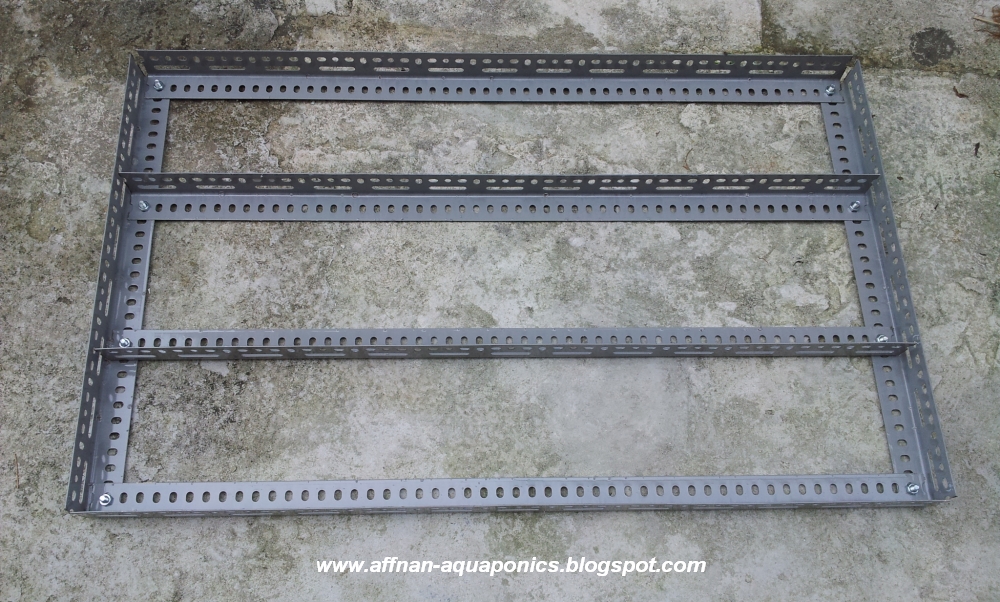
Above the rack top assembled, this photo the long length is 39" on final assembly I trim off another 3" making it 36" so that the growbed sit nicely on top, however it may have problem spanning the fish tank. If you need to span the fish tank with this rack its best to make it 39" x 24" x 27" but with this you may need extra angle iron to do.
Legs installed, but don't tighten any screw and nut yet just get it in and secure lightly, I need to make everything straight only then I'll tighten.
Two of that 36" and another two 24" piece make braces to add strength and rigidity. It may be a bit difficult to insert the screw due to holes not exactly align, however if you choose not to cut on the recommended location it then may be impossible to align.
Not sure this will hold pebbles because a fully laden growbed is about 200 kg in weight, with water it should be more around 250 kg . Hydroton should be OK due to its light weight.
Total cost for this rack is RM 70.00 which exclude man hour which is at about 3 hours.